Notice

All of these patterns belong to me. They are here for your personal use, but please do not post them to other websites. Instead, link back to them.

Notice

If you make any of these items to sell, you cannot claim the design as your own. You can claim that you handmade the item, but you must credit me, Julie Hicks, as the designer.

Wednesday, November 30, 2011

Ribbed Fingerless Mitts

I found this pattern on the net quite a few years ago, but it looks like it isn't there anymore and I can't remember who wrote it, but it's such a simple pattern that I'm going to put it here. The OP used sock weight yarn and a size G or H hook, but I like thicker ones, so I'm writing it for WW yarn. She also stitched them together with a yarn needle and I prefer to crochet them together.

This pattern is OSFM and gauge is unimportant. It can be easily adjusted larger or smaller depending on the size of the hand and how far up the arm you want the mitt to go. I have a fairly large hand so adjust as you like. They're ambidextrous-you can wear them on either hand.
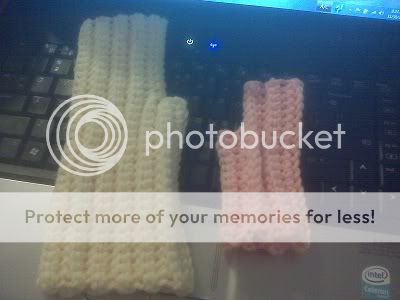


As you can see from the photo, they're easily sized for adults or children. I made both mitts with the same weight of yarn and the same hook just to show you. Also, my granddaughter and grandson want a pair so she'll get the peach pair and I'll do him some in another color ;)


Materials:

WW yarn such as RHSS-about three ounces should be sufficient for mitts as written.
Crochet hook size J
For slim hands use a size I hook and follow pattern
For very wide hands use a size K hook and follow pattern
For children you can use sportweight yarn and a size H hook

With a size I hook and a starting ch of 26 I got two pairs of mitts out of one 5 oz skein of varigated RHSS and only had a little bit left over. I believe you could do the same with the J or K hooks

Note. This mitt is easily adjustable since it is sl st together when finished. If you need it longer, just add more sts to thumb gusset. If you want it to cover more of your fingers just add more sts at the end of Row 6 (or 8). If you need the thumb gusset larger, add two more rows (making it 8 rows) before ch for the hand. If you want to cover more of your thumb, attach yarn to thumb gusset after joining mitt and work 3 or 4 rnds of sc around the opening.

Note, when adjusting for size, always keep your row count even instead of odd, this makes the joining less-visible.

Note: For a slightly longer mitt (about halfway between wrist/elbow), ch 26 for a starting ch (you will have 25 sts in your thumb gusset) and follow other directions as written.

Skill level: Advanced beginner/intermediate

Mitts: Make 2.

Thumb gusset:

Ch 21. Sc in 2nd ch from hook and in each ch across. 20 sc.

You will now be working in the BLO throughout unless otherwise specified.

Rows 2-6: Ch 1, turn. Working in the BLO, sc across. At the end of Row 6, ch 13 for hand.

Row 7: Sc in 2nd ch from hook and each ch across, sc in BLO of next 20 sc. 32 sc.

Rows 8-24: Rep Row 2. Do not fasten off.

Joining (Note: Keep your tension a bit loose for this): Turn work. You will now join piece together using sl st. Insert hook under both lps of first sc and in the first free lp of ch-12 opposite, YO and complete sl st. Continue this way for the next 11 sts. Next continue on down the side of the mitt using the free lps of beg ch-20 (This will leave an opening for your thumb). Continue in sl st until you reach the wrist, then end off and hide the two loose ends to the inside of mitt.

Note: You will be joining mitt on the right side, so do not turn mitt inside-out when done. The joining is harder to see this way (It resembles the ribbing).

Note: Before cutting yarn after joining, try the mitt on. If it's too tight, rip back and add a couple more rows (1 rib). Continue doing this until the mitt fits hand comfortably. While you do want some stretch, you don't want so much that it's too tight. It may look small when you first put it together according to the above instructions, but it will stretch, which is why I recommend trying it on before cutting yarn.

Abbreviations used:

Ch: Chain
Sl st: Slip stitch
Beg: Beginning
Sc: Single crochet
BLO: Back Loop Only
St(s): Stitch(es)
Rnd(s): Round(s)

Saturday, October 01, 2011

Comfy Slipper Sock

Materials:

RHSS yarn in two different colors. The sample in the picture is bright yellow and sage green. I'd say a couple ounces each should be sufficient to make socks

Crochet hooks sizes K and J


Skill level: Advanced beginner/intermediate

Note: This will fit a fairly large foot. I wear a size 8-1/2w ladies shoe and it's a bit loose on me, so you could go down a hook size and still have a large sock, or for even smaller socks used lighter yarn and smaller hooks. Me, I don't like snug socks, so they suit me just as they are.

Note: You will be working in a spiral for the foot/instep, use a stitch marker to mark beg of rnd.

There is no gauge, it's easily adjustable as you crochet. Just inc more or less to fit your foot and work more or less rnds until it covers your instep. Since it's toe up you can try it on.

With CA and K hook, ch 2.

Rnd 1: Work 8 sc in 2nd ch from hook. Do not join, place marker

Rnd 2: 2 sc in each sc around. 16 sc

Rnd 3: *2 sc in next sc, sc in next sc. Rep from * around. 24 sc

Rnd 4: *2 sc in next sc, sc in next 2 sc. Rep from * around. 32 sc

Next 24 rnds: Work even. Change to CB in last sc of last rnd.

Next  row: Sc in next 28 sc. Now you will work in rows. Ch 1, turn.

Next 12 rows: Rep prev row. Now, break off leaving a long end and use yarn needle to sew back seam, or simply sl st back seam together before breaking off.

Next: Attach CB to top opening near back seam of sock. Ch 1 and work 32 sc evenly around (or however many sc were in rnd 4 of toe/foot if customizing). Join with a sl st to first sc.

Now you will work the ribbing as follows:

Ch 17. Sc in 2nd ch from hook and in each ch across, sl st in next 2 sc of slipper opening, turn.

Next: Sk next 2 sl sts and sc in BLO of next 16 sc. Ch 1, turn

You will now work in BLO, sc in next 16 sc, sl st in next 2 sc of opening.

Continue as established until you have worked your way all the way around, then sl st ribbing together.

Note: As I said in the beginning, these slipper socks are easily adjustable. You can start out with 6 sc instead of 8. You can inc less/more, you can add/subtract rnds/rows to fit your particular foot, you can make the ribbing longer/shorter. You can also go down a hook size or two, or use even smaller hooks and sportweight yarn for small/kids feet. Feel free to experiment. Use only one color, stripe it, use self-striping, varigated yarn, the pattern is very flexible. To make the ribbing a bit more snug, go down two hook sizes when you make it.  Make it to suit you.

Enjoy.

Abbreviations:

Ch: Chain
Sc: Single crochet
Sl st: Slip stitch
BLO: Back Loop Only
Rep: Repeat
Prev: Previous
Rnd: Round

Friday, September 16, 2011

Corner-Corner Afghan

Materials:

Yarn and appropriately-sized circular knitting needle at least 29" long for baby blanket, longer for full-size afghans.

Note: Afghan is worked from one corner to the opposite corner, hence the name.

Note: You may also make this more cushy by working afghan completely in gart st (k each row), just inc in the first st of each row and then dec at the beg of each row.

Note: If you make afghan entirely in gart st, you do not need to use a marker.

Instructions:

CO one st.

Row 1: Inc 1 st by kfb

Row 2: Inc, k to end

Rep Row 2 until you have 7 sts on needle.

Next row: Inc, k 2, pm, k across.

Now work as follows:

Next Row (WS): Inc, k 2, p to marker, remove marker, k 4
Next Row (RS): Inc, k 3, pm, k across.

Continue in established pat until blanket is desired width. Then work as follows:

WS row: Dec (k2tog), k 3, p to marker, remove marker, k 4
RS row: Dec (k2tog), k 3, pm, k across.

Continue in this way until there are 8 sts remaining, then cont working in gart st, dec at the beg of each row, until you have 1 st remaining. Cut yarn and thread through last st and pull tight. Hide all yarn ends.

You can make this with all one color or change colors for diagonal striping pattern. Change colors at the beginning of RS only for a neat look. You may also work a design into the st st part as you go, or duplicate-stitch a pattern into it after knitting for even more variety. Any chart out there could be used, from simple to complex, as long as the stitch count matches the blanket.

Abbreviations:

CO: Cast On
k: Knit
p: Purl
kfb: Knit in front and back of indicated st
k2tog: Knit two together
RS: Right side
WS: Wrong side
inc: increase
dec: decrease
Rep: repeat
st st: stockinette st
gart st: garter st
st(s): stitch(es)
pm: place marker

Friday, May 20, 2011

Peaks and Valleys afghan

This is a typical crocheted sc ripple. A very good project to use up scrap yarn if you have enough to do two rows, or you can do it all one color or any combination of colors that you desire.

I call it peaks and valleys because it reminds me that the God of the mountain (peak) is the same God when you're in the valley. No picture yet, since it's a WIP and not very far along yet.

Note: To customize the size of the afghan, the starting ch is a multiple of 23+3. Chain a multiple of 23, then add 3 more to the end of it. Work until afghan is the length desired.

Materials:

WW yarn (I used RHSS) Sufficient to finish the afghan.

Crochet hook size 7.00 (Between a K and L, either will do)

Yarn needle to work in any loose ends.
_______________________________________________________________

With your MC or starting color, ch 187.

Row 1: Sc in 2nd ch from hook, sk 1 ch, *sc in next 10 chs, 3 sc in next ch, sc in next 10 chs, sk 2 chs, rep from * across to the last 2 chs, sk 1 ch, sc in last ch. 8 points.

Note: Work in the BLO from now on.

Row 2 and all other rows: Ch 1, turn. Sc in first sc, sk 1 sc, *sc in next 10 sc, 3 sc in next sc (top of point), sc in next 10 sc, sk 2 sc, rep from * across to last 2 sc, sk 1 sc, sc in last sc.

Repeat Row 2 for pattern, changing colors as you like. Always change colors by finishing the last half of the last sc with the new color by drawing it through the last two sts. Cut old yarn, leaving a long end for sewing in.

I'm doing one using off-white as the MC and bits and pieces of other colors as CCs. 12 rows of MC, then 2 rows of CC, beg and end with MC.

Note: For a scrapghan you will want enough of each color to do at least two rows (1 rib), it looks better if you change colors at least every two rows. For wider stripes, keep your row count even (2, 4, 6, etc) so that color changes happen on the same side of the afghan and it looks more consistent.

Abbreviations:

BLO-back loop only
ch-chain
sc-single crochet
rep-repeat
sk-skip
MC-main color
CC-contrasting color
beg-begin

Friday, February 25, 2011

Single crochet ripple tutorial

It's really not all that hard to calculate and crochet your own sc ripple, whether you're making a scarf, a wrap/shawl or an afghan. The yarn you use doesn't matter, just use a hook recommended on the wrapper, or don't go much bigger or smaller. Gauge isn't important either. Here's how it's done:

Figure out how many stitches you want on each side of the peak, add one for the peak and two for the skipped chains at the bottom. This is your multiple. Then crochet this multiple until you have as many peaks as desired, then add three more. This formula will work for any size sc ripple, no matter how many sts you want in each peak.

Say you want 7 sc along each side. Okay, that's 14. Now you will add 3 more (one for your peak and the two you will skip at the bottom). So that's 14 + 3 = 17. 17 will be your multiple. Now say you want 10 peaks for a wrap. Your starting chain will be 17 x 10 = 170. Now you'll want to add 3 more, bringing your total to 173. So your pattern will read multiple of 17 + 3, meaning you will chain your multiple (17) ten times, then add three more chains at the end.

Note: The instructions in parentheses below are to be repeated according to the instructions, which is all the way across to the last 2 chs/sc.

Note: When the instructions say BLO, that means crochet in the back loop only of each stitch from now on. This creates a very pretty ribbed effect and makes a nice, cushy fabric.

To crochet this, you will sc in 2nd ch from hook, sk next ch, (sc in next 7 chs, 3 sc in next ch, sc in next 7 chs, sk 2 chs) across to the last 2 chs, sk 1 ch, sc in last ch.

Row 2 and all other rows: Ch 1, turn. Working in the BLO, sc in first sc, sk next sc, (sc in next 7 sc, 3 sc in next sc, sc in next 7 sc, sk 2 sc) across to the last 2 sc, sk next sc, sc in last sc.

That's all there is to it. Use a little math and pre-planning and you can make anything from a scarf to a wrap to an afghan.

Here's some starting multiples for you:

4 sc on sides: Multiple 11 + 3
5 sc on sides: Multiple 13 + 3
6 sc on sides: Multiple 15 + 3
7 sc on sides: Multiple 17 + 3
8 sc on sides: Multiple 19 + 3
9 sc on sides: Multiple 21 + 3
10 sc on sides: Multiple 23 + 3

See the pattern?

Abbreviations used:

ch: chain
sc: single crochet
sk: skip
BLO: Back Loop Only

I hope I wrote these clearly enough.

Friday, December 31, 2010

Cushy warm booties

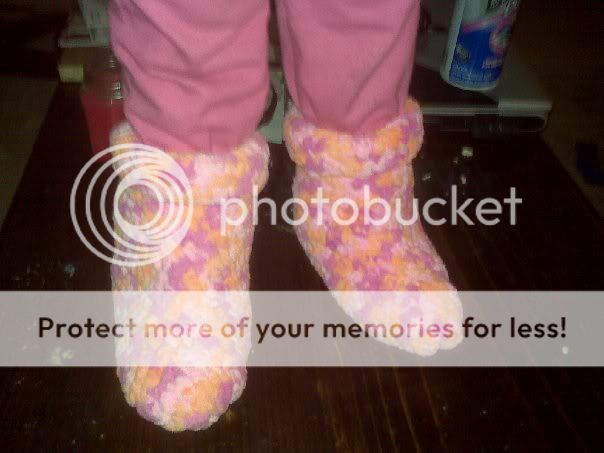
I sat and did these in a day's time (though I was distracted by three grandkids). They're very warm and cushy.
My granddaughter Kadi insisted on modeling them, although they're way to big for her.


Materials:

Bernat Baby Blanket, 2 balls, any color.
Crochet hook size K

Gauge: 4 sc= 1"

Note: I have no idea how to write for different sizes, but the way this pattern is written, it should be easily adjusted up or down for larger or smaller feet. I wear a size 8-1/2W shoe, so the pattern as written will fit a fairly large foot. If adjusted up or down, keep the number of stitches worked at an even number.

Note: You decide which side looks best, and that will be your right side. When you go to crochet bootie together, you will need to fold it so the right side is to the inside, then turn it right side out when finished,

Yarn substitutions: Since this is a very thick velour yarn, any comparably thick velour yarn should do nicely. You may also try holding several strands of WW yarn together, at least three strands. I may try that just to see and let you know. The yarn weight for Bernat Baby Blanket is 6, so use that as a guide. I made several pairs in Lion Brand Thick and Quick, so that works. For men, I'd use a size L (8mm) hook and only make 6 rows for cuff, leaving enough yarn to stitch with a large-eye needle. One ball will make one bootie this way.

Instructions:

Note: Ch 1 to turn all rows.

Dec: Insert hook in next st, YO and pull up a lp, insert hook in next st, YO and pull up a lp, YO and pull through all three lps on hook.

Sole:

Ch 55

Sc in 2nd ch from hook and each ch across. 54 sc.

Next three rows: Sc in each sc across.

Shape instep:

Sc in first 22 sc, work a dec over next 2 sc, rep dec over next 2 sc, sc in next 2 sc, dec over next 2 sc, rep dec over next 2 sc, sc in last 22 sc. 50 sc.

Sc in first 20 sc, work a dec over next 2 sc, rep dec over next 2 sc, sc in next 2 sc, work a dec over next 2 sc, rep dec over next 2 sc, sc in last 20 sc. 46 sc.

Sc in first 18 sc, work a dec over next 2 sc, rep dec over next 2 sc, sc in next 2 sc, work a dec over next 2 sc, rep dec over next 2 sc, sc in last 18 sc. 42 sc

Sc in first 18 sc, work a dec over next 2 sc, sc in next 2 sc, work a dec over next 2 sc, sc in last 18 sc. 40 sc.

Sc in first 17 sc, work a dec over next 2  sc, sc in next 2 sc, work a dec over next 2 sc, sc in last 17 sc. 38 sc

Sc in first 16 sc, work a dec over next 2 sc, sc in next 2 sc, work a dec over next 2 sc, sc in last 16 sc. 36 sc

Sc in first 15 sc, work a dec over next 2 sc, sc in next 2 sc, work a dec over next 2 sc, sc in last 15 sc. 34 sc

Sc in first 14 sc, work a dec over next 2 sc, sc in next 2 sc, work a dec over next 2 sc, sc in last 14 sc. 32 sc

Sc in first 13 sc, work a dec over next 2 sc, sc in next 2 sc, work a dec over next 2 sc, sc in last 13 sc. 30 sc

Cuff:

Work 10 rows of sc. Do not cut yarn.

Finishing:

Fold bootie in half, right sides together. Crocheting through both thicknesses, slst bootie together down the back seam and across bottom. Cut yarn and weave in ends.

Tip: Try to catch only one strand of yarn when crocheting bootie together to minimize the thickness of the seam.

Tip: It's really aggravating when you're crocheting the back seam together, if you find it too frustrating, try using a smaller hook to pull up a strand, then stick your working hook into it. Once you get to the bottom, it's much easier to crochet through the unused loops of the beginning chain.

Abbreviations:

ch: Chain
sc: Single crochet
dec: decrease
rep: repeat
YO: yarn over
lp/lps: loop/loops
slst: slip stitch.

Tuesday, June 23, 2009

Capelet

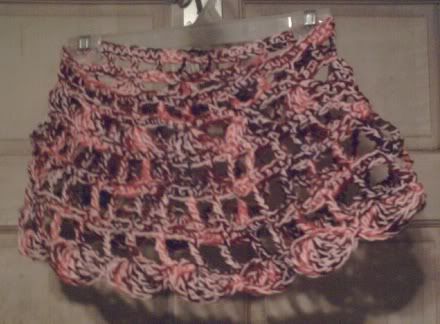
All right, here's my capelet:


Materials:

6 ozs WW yarn in two colors, or use two skeins of the same color.
Crochet hook size N

Gauge: Unimportant-OSFM

Note: Capelet is made holding two strands of yarn throughout.

I used Red Heart Super Saver in a solid pink and fiesta varigated, I think, they were partial skeins. 1 six oz skein of each color should be plenty to make the capelet.

Ch 72, join with sl st in first ch to form circle, being careful not to twist sts.

Rnd 1: Ch 1, sc in each ch around, join with sl st to first sc. 72 sc.

Rnd 2: Ch 5 (Counts as beg dc + ch-2), sk 2 sc, *dc in next sc, ch 2, sk 2 sc. Rep from * around, join with sl st in 3rd ch of beg ch-5. 24 dc and 24 ch-2 sps.

Rnds 3, 5, 7 & 9: Ch 1, sc in each st and ch around.

Rnd 4: Ch 5 (Counts as first dtr), 5 dtr in same sp, sk 5 sc, *6 dtr in next sc, sk 5 sc. Rep from * around, join with sl st in top of beg ch-5. 12 dtr groups

Rnd 6: Ch 7 (Counts as first tr and ch-3), sk next sc, *tr in next sc, ch 3, sk next sc. Rep from * around, end with sl st in 4th ch of beg ch-8.

Rnds 8 & 10: Ch 8 (Counts as first dtr and ch-3), sk next 3 sc, *dtr in next sc, sk next 3 sc. Rep from * around, end with sl st in 5th ch of beg ch-8

Rnd 11: Ch 5 (Counts as first dtr), 5 dtr in same sp, sc in next dtr, *6 dtr in next dtr, sc in next dtr. Rep from * around, end with sl st in top of beg ch-5. Break off and fasten.

Weave in all loose ends.

Abbreviations

Ch: Chain
SP: Space
St(s): Stitch(es)
Sk: Skip
Sl St: Slip Stitch
SC: Single Crochet
DC: Double Crochet
TR: Treble
DTR: Double Treble

Thursday, June 18, 2009

Triangular Garter Stitch Shawl


For a comfy, easy shawl, just use this formula:

Gauge is unimportant. Use any size circular and yarn to match, this is just a formula. You could use straight needles for a time, but you will have to go to a circular eventually to accommodate the increased number of stitches.

With WW yarn and size 9 circular needle (at least 29") CO 4 sts.

Sl the first st as if to k, inc in next st by KF&B, k across.

Continue in this manner until shawl is desired size and CO.

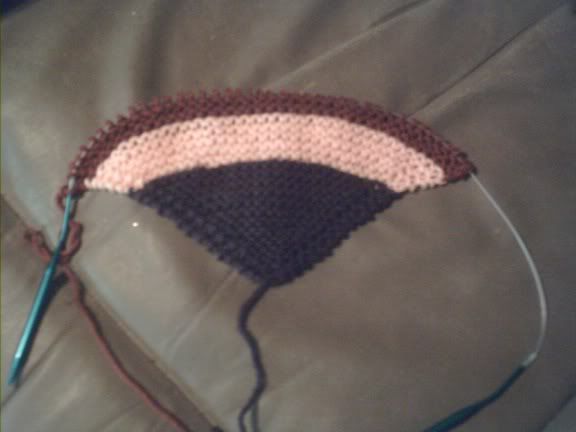
For stripes, change colors as desired. I'm using partial skeins of RHSS I've had for years, but you can use any WW yarn you like.

And yes, you could start dec after a time, make a big square and give it to someone for a baby blanket-it's based on the diagonal baby blanket pattern without the yarn-over increases.

Note: When changing colors, k the first st of the row, inc in next st, k across, then go back to sl the first st after the color is changed.

Note: Always change color on the right side of the shawl to keep the stripes looking nice and like the ones in the picture.

Abbeviations:

K: Knit
ST: Stitch
INC: Increase
SL: Slip
KF&B: Knit in the front and back

CO: Cast off

Monday, December 15, 2008

Fingerless Mitts


I'm editing this to something that might be a bit more understandable-I hope.

Cushy Soft Fingerless Mitts

Knit flat on a circular needle, then sewn up the side and the thumb worked in Magic loop-Bernat Soft Baby yarn never felt so good on the hands.

Materials:

Bernat Soft Baby yarn in white, or your choice of color-one skein will make several pairs. Or use a soft yarn which will give you the ribbing gauge below.

29" US#5 circular needle, 29" is the minimum length to use, longer ones may also be used. If you make them one at a time, a 16" circular can be used, but it is too short to make a pair at the same time.

4 stitch markers

2 small stitch holders

Yarn needle.

Note: You only need about a tennis ball size ball of yarn for each mitt. Knit both at the same time by winding a ball of yarn for each mitt off the skein.

Gauge: Ribbing-unstretched=4¼"LX1¾"W-L is measured across the bottom while piece is on the needle cable. If your gauge is close to this, you should be all right-mitt will fit most hands as they are quite stretchy.

If you need to make mitts smaller or larger for whatever reason, just make sure to CO an even number of sts and remember the thumb gusset is worked on the middle two sts. Also adjust your gusset size accordingly-less if they're for really small hands or more if the hands are larger than normal-wouldn't want to cut the circulation from the thumb-or make it too floppy-just use your best judgement.
*******************************************************************

Abbreviations used: K: Knit, P: Purl, CO: Cast On, sl: slip, st(s): stitch(es), st st: stockinette stitch, PM: Place Marker, KF&B: Knit in the Front and then in the Back of indicated st for an increase, beg: begin(ning)

If you want to work both mitts at the same time, wind about a tennis ball size ball of yarn from the skein for each mitt.

So, how does one knit a pair (or more) of mitts at the same time on the same needles? You use one ball of yarn for each mitt and cast each mitt onto the needle using its ball. You then work one row from the first mitt using that yarn, push it down onto the cable, pull up the other mitt and work that row with its yarn, turn, repeat until mitts are done. With a long enough circular needle, and enough balls of yarn, you could conceivably knit two pairs of mitts-but I would be careful not to tangle your yarn too much-or do this-unless you absolutely had to have two pairs of mitts done in the shortest amount of time possible.

Using the long tail cast-on, CO 40 sts from one ball onto the circular needle, push these sts down to the cable, then CO 40 sts from the other ball onto the same end of the needle, turn and start working mitts. Make both mitts exactly the same-I will be giving instructions for only one mitt, as they are ambidextrous and can be worn on either hand.

Note: Always sl the first st of each row-for K st, sl as if to K, for P st, sl as if to P.

Work 12 rows K1, P1 ribbing-This is what is measured for gauge

Work 8 rows st st

Thumb gusset:

Next row: K19, PM, KF&B of next 2 sts, PM, K19-42 sts

Next row: P across, sl markers when you reach them and cont to sl them.

Next row: K to marker, KF&B of next st, K to st before marker, KF&B of next st, K19-44 sts

Next row: P across

Rep prev 2 rows two times more-48 sts

Next row: K to marker, remove marker, K1, sl next 8 sts onto right needle WITHOUT working them, then sl them onto a stitch holder to be worked later, K1, Remove next marker, K to end-40 sts

Beg with P row, work about an inch and a half of st st, or until total length of mitt is about 6"-end by working a P row.

Next 4 rows: Work K1, P1 ribbing, BO in ribbing, cut yarn-leaving a long length for sewing and pull the end through the last st to secure it.

Thumb: Attach yarn and K the 8 sts from the holder, then slide these sts onto the cable, Pick up and K 8 more sts evenly around the thumb opening, then join and work 4 rnds of K1, P1 ribbing using the Magic Loop method. BO in ribbing, cut yarn, secure, then hide all yarn ends, except the long one at the top-thread this end into a yarn needle and sew the side seam of the mitt together using your preferred method of sewing a seam-making sure to fold the mitt with WS facing out. Hide yarn end when finished and turn mitt inside out.

Note: If you have trouble with Magic Loop, you can use a set of #5 DPNs-Divide the 16 thumb sts evenly onto the needles and work 4 rnds of K1, P1 ribbing. For a set of 5 needles, divide the sts evenly onto 4 of them-4 sts to each needle, for a set of 4 needles, have 5 sts to your first two needles and 6 sts on your third needle.

********************************************************************

This pattern is perfectly adaptable to working in the round as well. If you don't want to sew a seam, simply grab your #5 knitting in the round needles of choice, divide your stitches and start working. You may have to recalculate gauge a bit, since stockinette in the round has a slightly different gauge to stockinette worked flat. But as stretchy as the mitts are, I doubt there will be much recalculating.

If you do this using Magic Loop or two circs, change where you put your thumb gusset to as close as the middle two stitches on either side as you can get-it really won't matter-they'll still look and fit the same.

Just calculate about 1¾" to 2" of ribbing at the wrist, about an inch of stockinette before shaping thumb gusset then calculate what you would need for a comfortable thumb opening, then just add the two end stitches back and put the rest on a stitch holder, then work until mitt is between 5½" to 6" long, then work top ribbing.

Oh, and you'll do your gusset increases on every other round after you start them and work one more round even after finishing them before putting the stitches off on the holder.

For thumb opening, you want to pick up and knit the same number of stitches around the opening as you have on the holder and work your ribbing like the flat mitt.

Simple, huh?

Wednesday, November 19, 2008

Simply Soft Socks

Simply Soft Socks

Supplies:

1 Skein Caron Simply Soft-any color
1 Set of #3 DPNs
1 Yarn needle

Gauge: 6 sts and 9 rnds = 1 inch in Stock St

Note: This is a generic, plain sock, so if you prefer circs, by all means-use them-this pattern should work well for two circs or magic loop. If you wish to do two socks at once on circs, then simply wind half the yarn into another ball for the second sock-or, if you're lazy like me, simply buy another skein and have enough yarn for matching handwarmers or another pair of socks.

Note: You may need to adjust this pattern to your foot-I have a fairly wide foot and I don't like snug socks, but it should be easily adjustable-just keep an even number for the ribbing.
**********************************************************
CO 48 sts and divide however you like for the needles you're using-I like the heel/sole sts to be on the third needle-to be worked last.

Join and work 8 rnds k1 p1 ribbing. This will give you app. 1" of ribbing-work more or less to suit yourself.

Work 20 rnds in stock st-more or less to suit how long you want the cuff. On the last rnd, begin working your short row heel on the heel sts-I work until I have 6 unworked sts on each side-you do what you need for your heel and use your preferred short row method. I will link to a site that has descriptions and instructions for three types if you aren't sure about short rows-pick your favorite from them. Note (DPNs only): If you find the other two needles getting in the way-transfer the instep sts to a length of waste yarn until you're ready to work the foot of the sock, then transfer the sts back to your needles.

Note: There will be a hole on each side of the heel when you start to work in the round again-simply pick up a stitch between the needles, twist it, put it on the left needle and knit the two sts together to close the hole. Do the same when you get to the other side of the heel. After finishing the heel, work in the round in stock st until sock foot is about 2 inches from finished foot length-here I've found that my hand is a good measure, from the bottom of my palm to the tip of my longest finger is about where I need to start my toe.

Using the heel/sole sts again-do a short row toe exactly like you did the heel, then graft the instep and toe sts with kitchener st. I'll link to a nice tutorial for this too-it isn't as hard as you might think. You'll want to put all the instep sts on one needle for this step.

Note: If you'd rather do wool socks, feel free. This is just a basic pattern, so adjust it however you need.

Grafting

Wrapped st short row
Not my favorite-but included for fairness.

YO short row
This is the one I'm using.

Japanese short rows
I would recommend coilless safety pins for this short row.

For my foot (size 8-1/2W shoe, American):

8 rnds ribbing
20 rnds st st cuff
short row heel w/6 unworked sts each side
40 rnds st st foot
short row toe, same as heel

The sock is actually slightly big, but not overly so-and I don't like snug socks anyway. I wear an American shoe size 8-1/2, so figure yours from there.

Sunday, November 18, 2007

Wide Headband

This is a very simple, warm ear warmer, perfect for women (or men) who have long hair and don't like to wear hats because of it. I don't have a picture yet, I'll have to wait until I can get my hands on a camera.

About 1 oz of Cascade 220 Superwash, color 817-an off-white
About 1 oz of Classic Elite Inca Alpaca, color 1168-brown
Knitting needles size 13US, 9mm

Gauge is unimportant-I did have 4 rows=about 1"-unstretched
******************************
You will work with one strand of each yarn held together as one.

CO 20 sts.

Slipping the first st of each row, work garter st for 64 rows. BO.

You can sew or crochet the two narrow ends together, I put them together as I bound off by putting my right needle through a st, and then through a lp of the beg row before making the st and binding off. It doesn't really matter-I was just experimenting. Hide all loose ends.

You can size this to any size head, just account for the stretchiness of the garter st as you make it-my head is 22" and I made mine about 16"-18"

You could use any yarn/needles, just use the measurement of the head you're making it for and make it about 4"-6" smaller. Mine is a bit loose, it depends on how tight you want it.

Try using one strand of super chunky yarn instead of two smaller strands.
*******************************************************************
Crochet version.
I haven't tried one yet, but it would be very simple, simply use a large crochet hook, ch 15-21(depending on how wide you want it) and work in sc or hdc ribbing (work each row in the BLO of the row below) and then crochet the two ends tog.

You will ch 1 to turn each row-for sc or hdc-it will not count as a st.

Thursday, November 09, 2006

Wooly Wristwarmers


I just came up with this and only have one of the pair done but I like it so much that I'm going ahead and posting. They are ambidextrous-you can wear them on either hand.

Materials:

Yarn and hook of your choice-you also will need a hook two sizes smaller (to work ribbed cuff)

Gauge-There is none-make to fit.

To determine your starting ch: With your chosen yarn and hook, make a gauge swatch in sc to determine your stitch gauge. Measure around the palm of your hand and multiply your stitch gauge by this number-this will be your starting ch.

To determine ch for thumbhole: Measure around the base of your thumb and multiply by your stitch gauge-this should give you the # of chs for thumbhole-you can always add or subtract if need be by trying it on and seeing if the hole is comfortable for your thumb.

Note: I am turning rnds for a couple of reasons-

1: It keeps the side seam straight.
2: It adds a nice texture to the glove.

Note: The larger hook is used on the thumb ribbing and top ribbing since the glove is made to fit and doesn't need to be snugged up, and your fingers do need wiggle room. If you find that it's too loose, just go down one hook size for those ribbings.

Instructions:

Note: I am giving the instructions for Lion Wool and a J hook-which is what I used. This wristwarmer should fit an average woman's hand. I used an H hook for the cuff ribbing-this brings the bottom of the glove snug with the bottom of the hand.

With larger hook ch 22, join to form ring, being careful not to twist ch. If this does not go around your hand, add more chs.

Rnd 1: Ch 1, sc in each ch around, join with sl st to first sc. 22 sc.

Rnd 2: Ch 1, turn, sc in each sc around, join with sl st to first sc.

Rnds 3-6: Rep rnd 2.

Rnd 7: Ch 10 (if this is too tight for your thumb, add more chs), turn, sc in each sc around and in each of next 10 chs of ch-10, join with sl st to first sc. 32 sc

Rnds 8-17: Rep Rnd 2 over 32 sc-glove should just come to the bottom of your hand. Do not end off.

Note: If you find my instructions for the ribbing to be confusing, just go to Dot's

She has a tutorial with pictures, just remember to ch 15 for your cuff-or ch for whatever length you want yours to be, 15 will give you about a 3" cuff.

Cuff Ribbing: Change to smaller hook and ch 15, sc in second ch from hook and next 13 chs, sl st in bottom of glove in same sc as last join and sl st in next sc of glove, turn. 14 sc. Note: Always skip these two sl sts when going back the other way.

Next row: Sc in BLO of next 14 sc of ribbing, ch 1, turn

Next row: Sc in BLO of each of next 14 sc, sl st in next 2 sc of glove, turn.

Rep these two rows until you get around entire bottom of glove. Sl st opening closed. If you desire longer ribbing just add more chs to starting ch.

Thumb hole ribbing: With larger hook, attach yarn to first unused lp of ch-10, ch 4 and work ribbing over around thumb hole same as cuff ribbing. Ribbing will be 3 sc wide

Top ribbing: With larger hook, attach yarn to any unused lp of starting ch at top of glove, ch 4, work ribbing same as cuff ribbing. Hide all ends, turn glove inside out and wear. Ribbing will be 3 sc wide.

Note: If you want washability, any soft acrylic will work-such as Caron Simply Soft.

Abbreviations used:

Ch(s): Chain(s)
St(s): Stitch(es)
Sc: Single Crochet
BLO: Back Loop Only
Lp(s): Loop(s)
Rep: Repeat
Sl St: Slip Stitch

This pattern © Julie Hicks November 9, 2006

You can make one hard copy for your personal use. I would rather you didn't sell the item but make for gifts or for charity.

Sunday, October 01, 2006

Finger Puppet


These little finger puppets were knitted by a woman named Gladys Wilson, who started knitting them in 1988 and has made more than 50,000. She donates them to hospitals mostly and the kids love them. She knitted them from memory and never had a written pattern until a story was done about her back in February 2006 for Mature Living magazine. So many people wrote in wanting the pattern that Ms. Wilson graciously sat down and wrote it out. Christian Gregory tested the pattern and tweaked it and I'm putting it here for anyone else who wants to make these for donations to hospitals, children's homes, etc.

This is not my pattern, I'm just reposting it here for others-please do not make these items for sale.

Materials


WW yarn in two colors-washable and dryable
6-ply cotton embroidery thread in appropriate colors, such as red for mouth, black for nose, abn black and blue for eyes
Knitting needles size 7
large-eyed needle
scissors
1" wide piece of cardboard.

Instructions

Cast on 14 stitches with dark color:

Knit 8 rows

Change to lighter color for face:

Knit one row
Purl one row
Repeat for 10 rows stockinette stitch
Change back to first color:
Knit 3 rows
Purl 1 row
Knit 1 row
Purl 1 row
Knit two together across row-there will be 7 stitches remaining on needle.

Cut yarn approximately 8 " long.
Thread yarn on needle and run back through seven stitches.
Remove from needle.

Finishing

Make the face: Lay puppet piece out flat. Find approximate center. Use embroider thread to stitch eyes, nose, and mouth. Follow the pattern, placing features like in the picture.


Alternate face (my own modification): Using the graph, duplicate stitch the face in the appropriate colors. Graph shows the light stitches only . You could also work the face in as you're knitting if you like but I think it would be easier to just duplicate stitch the face in.

Place front sides together and sew down the back of knitted piece to make a tube.

Pom-pom: Using both colors of yarn, wrap ten times around a 1-inch piece of cardboard. Tie off one end; cut the other side. Fluff and trim into ball shape. Sew to top of finger puppet for hat.

Image Hosted by ImageShack.us


Image Hosted by ImageShack.us

Monday, September 11, 2006

Quick and Cushy Potholder

This pattern uses Helena's Potholder Stitch so I really won't be copyrighting the pattern since it's basically all that stitch.

Materials: One ball (2 oz) Peaches and Cream, Sugar and Cream or any other comparable WW cotton yarn.

Crochet hook size J
_________________________

Ch 25 and work the above potholder stitch until the piece is roughly square. End off and hide any stray ends.

It should take less than a ball of yarn and you might even get two potholders out of one ball. If you were going to make a lot of them for gifts and such then you might want to invest in a 1 pound cone.

Tuesday, August 29, 2006

Doubleknit potholder

This is a great way to practice doubleknitting. Doubleknitting has been around at least since Hoover's time- see Hoover blanket-but I would practice with a potholder first. You really don't need to make a wide border for potholders but can make the whole thing in doubleknit and it will make a nice thick potholder.

Materials: WW yarn in two different colors, straight knitting needls size 6-I'm using RHSS but you can also use S&C cotton and also get a nice thick dishcloth.

Crochet hook if you want to make a loop in corner.

Gauge is unimportant.

Note, try not to twist your yarns together while knitting except at the beg of rows (where you'll twist them tog once to keep edges together), with practice you can do this quite easily.
-------------------------------------------------------

There are several ways to cast on for this, I like two ways: With the darker color, CO double the number of sts you'll need for your project (30 would be a good size so CO 60)

Alternate method: Holding both colors together CO 30 sts-making sure your colors always fall the same way-dark/light or light/dark

Start your doubleknitting-holding both yarns tog, K the first st with your first color, bring both yarns to the front and P the next st with your CC, bring both yarns to the back, K the next st-always alternating colors. Continue in this manner to the end of row.

Next row, you will be K the sts you P in the prev row and P the K sts. Twist your yarns tog once before starting.

Continue in this manner until potholder/dishcloth is the size you want. BO by K2tog across-still using both yarns. At the end of the BO insert crochet hook in the st left and ch 1, sc evenly around potholder. When you reach the beg of your border ch 10 and ss in first sc. End off and tuck in all loose ends.

If you've done this correctly you will have a potholder/dishcloth that is one color on one side and another color on the other. When you get accustomed to this method you can start working patterns into your project which, when finished, will be opposite images of each other on each side. To work stripes you would alternate your colors every few rows.

I will have a picture up as soon as I finish the potholder I'm working on.

Meanwhile, check out this free pattern from KnittingHelp
Hot Pad

It shows what each side will look like when it's finished.

Wednesday, March 29, 2006

Peace, Be Still Shawl


Materials:
Joann Sensations Rainbow Boucle-1 skein Dark Blue
Knitting needles size 10½, 29" length
Yarn needle for weaving in loose ends

Gauge:Unimportant

Note: Slip the first stitch of each row as if to K for a smoother edge.
Note: Row 1 of Pattern Rows is RS

Pattern Rows:
1: K
2: K 3, P to last 3, K 3
3: K 3, (KFB of next st) 3 times, *(K2TOG) 6 times, (KFB of next st) 6 times, rep from * across to last 9 sts, (KFB of next st) 3 times, K 3.
4: Rep row 2.

Directions:

CO 114 sts and K 6 rows for gart st border.

Work Pattern Rows until shawl is the length desired, K 6 rows for gart st border and BO in K.

Using yarn needle, work loose ends in on WS of shawl.

Abbreviations:
CO..........Cast On
BO..........Bind Off
gart st....garter stitch
K.............Knit
P.............Purl
KFB........Knit (in) Front (and) Back
K2TOG..Knit 2 Together
St(s).......Stitch(es)
WS..........Wrong Side
RS...........Right Side

Thursday, March 02, 2006

KopyKat Sea of Tranquility

Since none of the feather and fan patterns I ran across online were written right I decided to sit down with some yarn and needles and come up with my own. It's very similar to the Feather and Fan Dishcloth. The only differences are I fixed Row 6 of the pattern and added a couple of more knit rows after that because that's the way I remember the one I had. I know it's not an exact copy of the one I had, which is why I'm calling it KopyKat.
******************************************
Materials: I used Bernat Softee Baby and size 10½ straight needles

Note: If you make an afghan using this pattern then use a circular needle.
Note: Slip the first st of each row for a nicer edge.

Cast on a multiple of 18 sts + 6 more-I cast on 78 and am making a wrap.

K 6 rows for garter st border.

Now do pattern as follows:

Row 1: K
Row 2: K 3, P to last 3, K 3
Row 3: K3, (K2tog) 3 times, *(YO, K1) 6 times, (K2tog) 6 times, rep from * to last 9 sts, K(2tog) 3 times, K 2
Rows 4-6: K

Repeat these 6 rows for pattern until your project is desired size, end by working Row 3.
K 6 rows for garter st border and BO in K.

Work in any loose ends.

Abbreviations used:

CO: Cast On
BO: Bind Off
K: Knit
P: Purl
YO: Yarn Over
K2tog: Knit 2 together
st: Stitch
*****************************************
This pattern has not been tested with anyone other than myself so if you try it and find a problem, please let me know.

Saturday, January 21, 2006

Shell of a Pattern

Appropriate yarn and hook for your project

This pattern can be used for anything from a scarf-baby afghan-full size afghan. It's only limited by your own imagination.

Sts used in pattern:

half shell-ch 4, dc in first st of row.
shell-(Dc, ch 1, dc, ch 1, dc) all in same st

Foundation ch-Multiple of 3 + 4. For illustration purposes let's say 22, this would make a nice scarf.

Dc in 4th ch from hook, sk 2 ch, sc in next ch, *sk 2 ch, shell in next ch, sk 2 ch sc in next ch. Repeat from * across. Turn.

Next row-Half shell in first sc, sc in 2nd dc of next shell, *shell in next sc, sc in 2nd dc of next shell. Repeat from * across, end sc in 3rd ch of beg ch-4

Repeat this row for the length of your project. Change colors in last half of last sc of row if using multiple colors.


© Julie Hicks January 21, 2006

Tuesday, January 17, 2006

MTF Booties/Slippers

Free Image Hosting at www.ImageShack.us

These are Make-to-Fit slippers that will work for anything from a baby bootie to an adult slipper. All you need is yarn, hook and three measurements.

Recommendations:

Baby booties: Baby yarn (the softer the better) and a smaller crochet hook (E, F or G)

Children: Anything from Baby yarn to WW and crochet hook from G-I

Adult: Anything from Baby Yarn to WW and crochet hook from I-K

I would be careful using wool, unless it's superwash wool.

If you'd like to try this with thread and a steel hook, let me know how it turns out.
***************************************************************
Firstly, if the foot the bootie/slipper is intended for is not around to try on the slipper as you go (or it's a surprise) then you need three measurements:

Length (toe-heel)
Instep (toe-ankle)
Circumference (around widest part of foot)
***************************************************************
Note: Keep records as you go so it's easier to make the second slipper.

Note: Any stitch from sc-dc can be used for the body of the slipper, I'm using hdc for illustration purposes. The cuff will be done in FPDC/BPDC

Note: If you use sc, work in a spiral instead of ending each rnd. Use a stitch marker/safety pin to mark first st of each rnd until you get to instep.

With desired hook and yarn ch 2, 6 hdc in 2nd ch from hook. Join with sl st to beg hdc. 6 hdc.

Rnd 2: Ch 1, 2 hdc in each hdc around, join with sl st to beg hdc. 12 hdc.

Continue increasing 6 hdc evenly spaced until circumference of circle is app that of foot. Since the slipper will probably be stretchy, depending on yarn, it would be best to make it a bit smaller.

Work even until slipper is the length of instep. You will now be working in rows. Remove stitch marker at this time if using sc.

Ch 1, hdc in same sp and around, leaving from 2-4 hdc free at end for instep-depending on width of foot.

Next row: Ch 1, turn, hdc in each hdc. Continue in this manner until length of slipper is length of foot, ending with right side row.

Turn slipper inside out and sl st heel opening closed. Break off and fasten. Turn slipper right side out.

Edit (10/29/08): I really should have thought of this before. Get creative with this pattern and try some of the novelty yarns-bouclé, fuzzy, furry, whatever. Try holding a strand of yarn with a strand of fuzzy or furry for some thick, warm fuzzy slippers-I've even found the fuzzy and furry yarn on special at some stores for as little as $1 a ball, so it doesn't have to be expensive at all.

Hat pattern can be found here.

This pattern © Julie Hicks, January 16, 2005.

Monday, January 16, 2006

Ribbed Baby Hat

Free Image Hosting at www.ImageShack.us

Materials:


Bernat Softee Baby yarn

Aluminum crochet hook size I
**********************************

Ch 4, join to form a ring.

Ch 2, 11 hdc in ring-12 hdc, inc beg ch-2-join to top of beg ch-2.

Rnd 2: Ch 2, hdc in same sp, 2 hdc in each hdc around-24 hdc-join to top of beg ch-2.

Rnd 3: Ch 2, hdc in next hdc, 2 hdc in next hdc (hdc in next 2 hdc, 2 hdc in next hdc) around. Join to top of beg ch-2. 32 hdc.

Rnd 4: Ch 2, hdc in next 2 hdc, 2 hdc in next hdc (hdc in next 3 hdc, 2 hdc in next hdc) around. Join to top of beg ch-2. 40 hdc.

Rnds 5-15: Ch 2, FPDC in next hdc, (BPDC in next hdc, FPDC in next hdc) around, join to top of beg ch-2.

End off after last rnd and hide loose ends.

This hat is easy to tailor larger, just continue to inc 8 sts evenly spaced before beginning the ribbing. If it's needed you can also add more rnds of ribbing.

Abbreviations used in this pattern:

Ch- Chain
hdc- half-double crochet
FPDC- front post double crochet
BPDC- back post double crochet
Rnd(s)-round(s)

Instructions for FPDC/BPDC can be found here. Scroll down to the last two illustrations.

This pattern © Julie Hicks, January 15, 2006.

Bootie pattern can be found here.